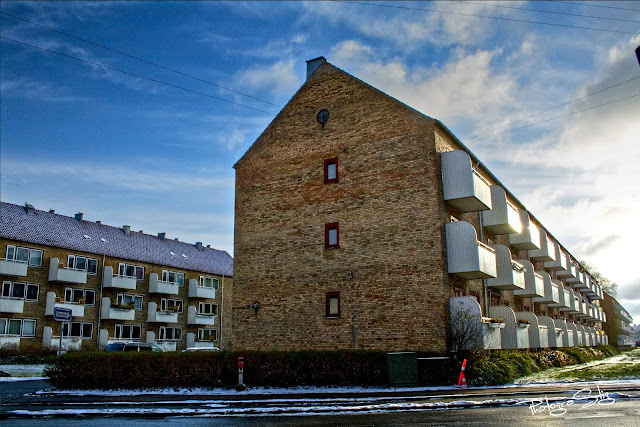
HDR stands for High Dynamic Range - meaning the photo consist of a larger range of what? light.
HDR photographing is a method to produce photos with a larger range of light than a normal photo. When taking a photography the camera is not able to collect a range of light as the human eye - the range of light is smaller than the view from the human eye. Not even the most expensive cameras is able to produce a range as wide as the eye.
One way to expand the range of light is the HDR-photography. The method is quite simple as the magic happens on the computer using a HDR-software. So how do we begin?
First you have to find your motiv. Instead of taking just one photo of your motive you will have to take three (sometimes just two and sometimes more than three). The easiest way of doing this is to go to the menu on your camera and in the settings you'll set the AEB bar so the markers are in fx. 0, -2 and +2. This means that when firering off the camera will automatically take three photos exposed on 0, -2 and +2 if you keep pressing the button down.
Now you have three photos with different exposures and now its the time for the magic. The way to do that is importing the photos to a special HDR-software that can compose one picture from the three input photos you've taken and in that way the program output is a photo with the total range of exposure of all three photos - and in that way you now have a higher ranged photo - a HDR-photo.
To deepen the software part depends on the software you want to use. Softwares like Photoshop and Photomatix is able to stitch differently exposed pictures together, but as you'll probably know, these softwares are expensive. If you don't want to use all of your money on softwares you can easily use one of the free softwares there are on the net. I have tried one of those and in the following you can see how to use the software named Luminance-HDR.
When installed you'll have to open the software. Click on the button 'Open New HDR-image'. Then find the photos you want to import.
The software will now analyze the images you have now imported and automatically analyze the luminance or exposure level on the image. When the program have done that you are ready to produce your HDR-image.
Click on the 'auto-align pictures' button and click next. The software now stitch your photos together and produce the output picture.
The next window you'll see is the output photo along with some settings. As you can see above you'll have the opportunity to choose how the software stitches your photos. The software can make the luminances as a difference (E-P) or it can do it as an overlay adding the luminances up. The overlay option is most of the times the most preferable, but sometimes the other options can make some great effects.
When pressing next you'll get a new window with some other settings. Here you can choose different default settings of the Tone Mapping settings. The most common default for me is the 'profile 1'. When choosing the profile 1 you'll come to the main menu where you can see your final result. Now you have created your HDR-photo. Of course you can do more. There are several other default settings in the right side of the window. You can choose operator, and there's even samples on how the operator affects the image. Try different operators and settings and see what you'll like - no HDR-photo is right or wrong - only the imagination and level of tolerance concerning the "fake" effect stops you. My preferred settings is the 'Fattal' with the 'beta'-slider in the left side of the window set on 0,95 or 0,90.
When you have chosen the preferred settings you are done and now you'll just have to export your photo. You do this by changing the result size in the bottom left to the highest possible - 3888x2592 pixels. Check the box 'Update current LDR-image' and press 'Tonemap'. Now the image is full size and ready to export.
Press Save as, choose the output folder, press save. Now a window shows up with the option of choosing quality - choose 100%. Press save and let the software work. Now you can close the window and save the project as a separate file.
Now you will have a Luminance-HDR file in the output folder along with the final image!
Here are some samples of HDR photos along with the original photos:
 |
| Exposure -2 |
 |
| ISO 1600 | 18mm | f/9 | HDR |
 |
| ISO 1600 | 18mm | f/9 | HDR |


No comments:
Post a Comment